GIT HUB:
Why use github to host a copy of your project for Voxel Engines:
There will be several advantages to using github:
1.) It will allow you to work on the same version of your code in two (or more) places: at home and in class
2.) It will provide a safety net against bugs: when you ‘commit’ a new version of your code to a git repository, git keeps track of your changes over time. If, at some point, you introduce a bug that you can’t diagnose, you will be able to retrieve a copy of your code from before the bug was introduced.
3.) I’ll be able to find and look at your code easily.
4.) In addition to being a ‘version control system,’ github serves as a convenient way to back up your project. Never have just one copy of something that would be inconvenient (or worse) to lose!
5.) If you think you may ever be doing any more programming in the future, you’ll end up finding git and github to be extremely useful.
Clarification: git is different from GitHub. Git is the program that creates and maintains ‘repositories.’ GitHub is a website and service that hosts git repositories.
How (Summary):
1.) Get an account on GitHub.
2.) Get git and (optionally) the GitHub client program for your computer at home.
3.) On github make a new repository for you voxels project.
3.) Set up Eclipse Luna to push to and pull from this repo (on your school and home computers).
How (in Details):
1.) Get an account on GitHub.
Go to github.com and sign up, if you don’t already have an account.
2.) Get git and the GitHub client program for your computer at home.
Check whether you have git on your computer. In terminal/dos-prompt type: ‘git’.
If you get a ‘usage help’ message, you have ‘git.’ If you get “command not found” (or the windows/DOS equivalent), you don’t have git.
One easy way to get git is to install the GitHub GUI client:
On Mac:
On Windows:
3.) On GitHub make a new repository for your voxels project.
Go to github.com and sign into your account
Click the “Repositories” tab (middle of the page)
Click “New”
Name the repo: “<your-initials>voxels”
Hit create. (You can add a description and a README later).
Keep this browser window open for reference in step 4…
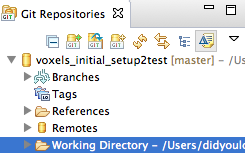
4.) (At school) Set your project to push to your repository.
In Eclipse: click COMMAND+option + w (or right click and choose: Show in >) and choose Git repositories. (The git repositories view appears on the lower left.) You should see something like this.
And hit COMMAND + I to get its properties.
Click ‘open’ to open the projects git config file and then ‘OK’ to get rid of the window.
Back to the browser window: copy the url for your newly created repo. Should look something like:
https://github.com/mygithandle/myvoxels.git
In the config file in eclipse replace the current url (url = “https://github.com/melsov/voxels_intial_setup”) with your url.
Save the config file.
Add the project to index:
R-Click the top level folder in your project in the project explorer. Choose Team > Add to index
Make a gratuitous change to your project and then commit and push
Open any file in your project and add a comment like: ‘//I wrote this’
R-click on the top level folder again in the Git repositories panel in eclipse and choose Commit…
Write a commit message: ‘first commit!’
hit ‘Commit and Push’
In the next dialogue, your projects URI may already be filled in. If not, it should be the same: https://github.com/mygithandle/myvoxels.git
Enter your password
click next
click ‘Add all branch spec’
click next
verify that your push is accepted (not ‘rejected-not fast-forwarded’)
click finish.
phew!
When your done with class, commit and push again.
At home:
Go to file: > Import > Git > Project from Git
Import using the same repository url: https://github.com/mygithandle/myvoxels.git
Make a test change and commit and push as above.
From now on:
When you do some work at home, push and commit it to your remote repo on GitHub. When you come to class, pull the latest version of the code to your workspace on your class computer. (And do the same thing in reverse, when going from class to home, etc.)